Screener Tips & Tricks – Customizing Columns
In this tutorial, we are going to show you how to add, move and delete columns in your Screeners, as well as change the order of the results in your columns, so you can arrange the data just the way you need it.
[NOTE: If you haven’t read the Screener Basic tutorial, we recommend you do that first. You can read it here.]
To customize the columns in your Screener, here’s what to do:
STEP 1: Open a Screener
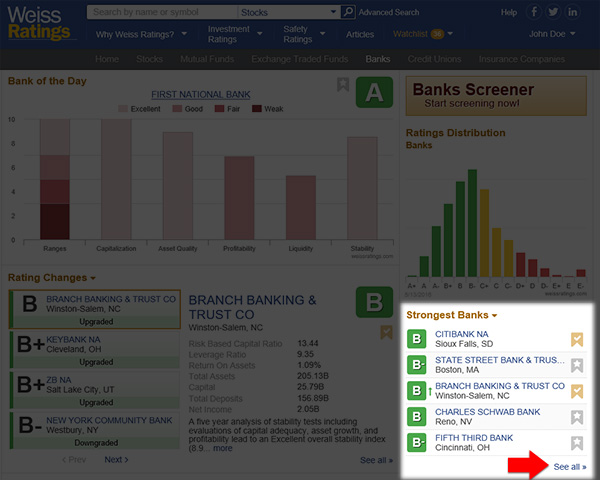
For this example, we are going to use a Bank Screener that is always available on the main Bank Safety Ratings page.
On the bottom right of that page, you’ll see a list titled Strongest Banks. Under the last bank listed, you’ll see a link that says “See all.” Click that link.
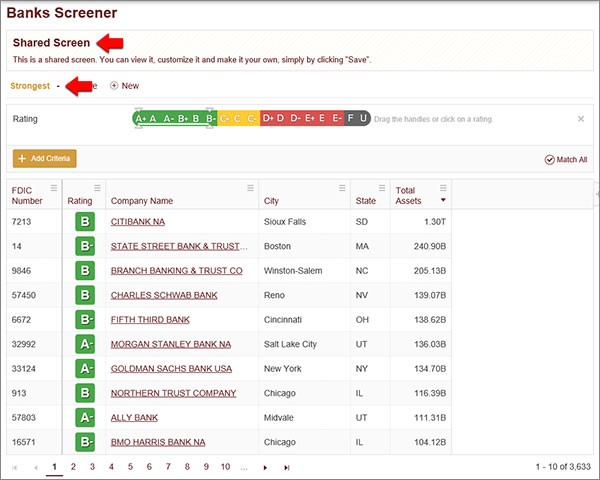
You’ll be taken to the Screener we have created called “Strongest.” At the top of the page, you can see this is a Shared Screen that you can view and customize, then save.
[NOTE: Many of the mini reports you find on our pages are simply Screeners we have created to deliver specific information and results. You are able to customize and save any of them.]
Under “Shared Screen” is the name of the Screener in gold. This is where you can rename the Screener after you customize it, if you’d like to save your changes, simply by clicking on the word Strongest, typing in a new name, and clicking Save.
STEP 2: Re-order Column Results
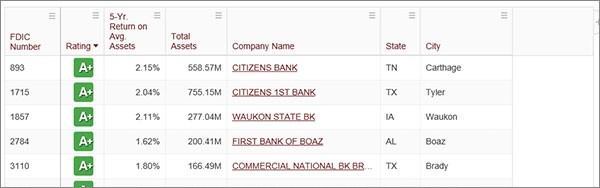
If you look at the far right column in our results you’ll see a small down-pointing arrow next to the title, Total Assets.
This tell us two things:
1. The results in that column are in descending order of highest to lowest Total Assets.
2. This is the column controlling how all the results are displayed.

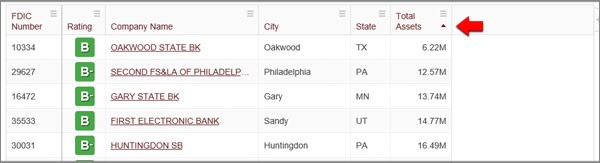
To change the order from descending to ascending, all you need to do is click the arrow and the results will now display the bank with the lowest Total Assets at the top.
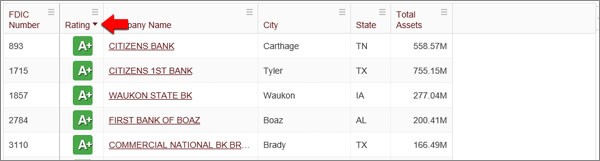
If you’d rather see the results ordered by Rating, all you need to do is click in the Rating column and the down arrow will now display in that column, with the results in descending order of Rating. Click the arrow again, and they’ll be displayed from lowest rating to highest.
You can do this with any column. Results displayed as words, City and State in this example, will be sorted by alphabetical order.
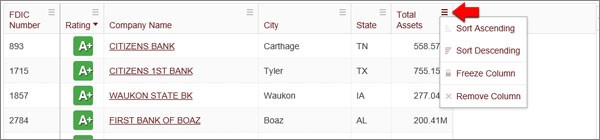
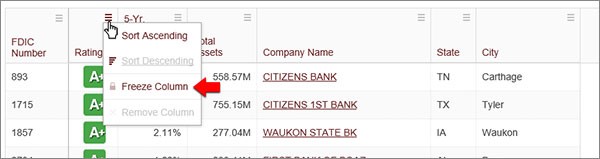
OPTION: You can also change how a column’s results display by using the pop out box. Just click on the pop out icon in the upper right of each column, and you’ll get a menu of options to sort the results, freeze the column (more on that in a minute) or delete the column entirely.
STEP 3: Adding Columns
There are two ways to add columns to your Screener:
1. Use the “+ Add Criteria” button as discussed in the Screener Basic tutorial
2. Click the Add Column button in the results.
And you’ll find that Add Column button to the far right of the column titles. It’s a plus sign (“+”), and if you hover over it, a tool tip will appear letting you know this is the Add Column button.

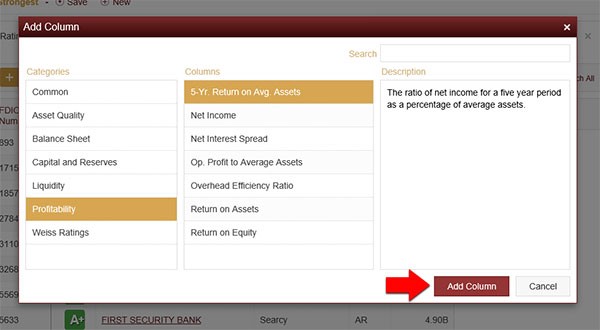
Click the Add Column button, and you’ll get a pop out menu of choices for that particular Screener category, the same choices you get if you were to select “Add Criteria,” as you learned in the Screener Basic tutorial.
For this example, we’ll select “Profitability” from the Categories, then “5-Yr. Return on Avg. Assets” from the choice of Columns, then click the red Add Column button to add that data.
You’re then taken back to your results page, and can see that column has been added as the farthest right column.
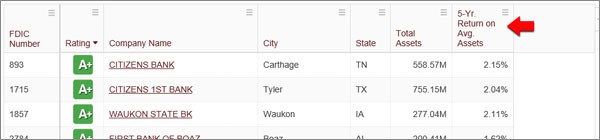
And as you learned above, by clicking in that column you can sort your results by the 5-Yr. Return in ascending or descending order.
STEP 4: Ordering Columns
But what if you don’t want that column all the way at the end? What if you want to see that data right next to the bank’s Rating? And followed by their Total Assets? You can do that simply by dragging the columns into the order you like.
Just click anywhere in the column’s title box and drag the column left or right. You’ll notice a box with the column title appears to let you know it’s grabbed and moving. As you drag it, you’ll also see a set of handles appear between columns to show you where the column will be placed.
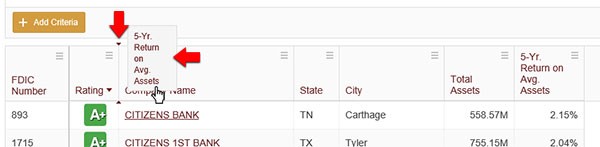
When you let go, your column will be in its new position. Move Total Assets to the right of 5-Yr. Return and your Screener now displays like this, making it easier to compare data side by side:
STEP 5: Locking Columns
If you want to keep the position of a column where it is, you can lock it in place. To do that, click on the pop out icon in the column’s title box, and select Freeze Column.
The column will now stay in place and you can unlock it at any time, by going back to the pop out menu and selecting Unfreeze Column.
TIP: You can move and freeze a column in one step. When you select Freeze Column in any column, no matter where it is, it will automatically jump to the immediate right of the last frozen column.
Try this the next time you view or create a Screener. It makes it very easy to view and compare the data you want.
Yes: Return to the Weiss Ratings homepage
No: Back to previous page - Weiss Ratings help