How to Use the Screener - Overview
One of the most powerful tools available to you is our Screener. It gives you the ability to create a nearly infinite number of customizable ways to view our Ratings—letting you “slice and dice” them any way you like, to deliver the information you want to know…
Do you want a list of the top 10 stocks that were recently upgraded?
Find banks with a liquidity ratio under 10%?
Or identify mutual funds with total assets between $5B and $20B that had a minimum 10% return over the last three months?
You can do all of that and much, much more—drilling down as deep and as narrow as you like—with our Screener. PLUS, you can save the Screeners you create so you can refer back to them over and over, with the Ratings and data automatically updated for you.
Since the Screener is so versatile—and since each Ratings industry has its own unique Screener--we’re going to dedicate several tutorials (and some tips & tricks articles) to showing you how to get the most out of this amazing tool.
In this tutorial, we’re going to give you an overview of the Screener and how to put it to work for you right now.
STEP 1: Open a Screener
You can find the Screener three ways:
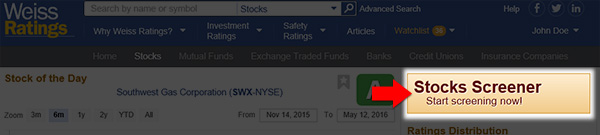
First way: On the main page of every industry you’ll find the Screener button in the upper right corner:
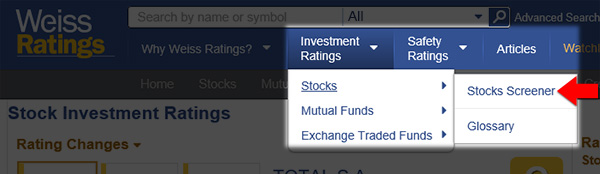
Second way: If you hover over an industry name in the navigation bar, you’ll get a pop out directory that takes you to the Screener for that industry:
Third way: On the main page of every industry you’ll notice the words “See all” in the lower right corner of many of the widgets. Clicking that link not only shows you all of the results for that widget, but takes you to the Screener we created to deliver those results. (And since they can be added to and changed, those Screeners are a great jumping off point to creating your own. But more on that in another tutorial.)

STEP 2: Add and Define Criteria
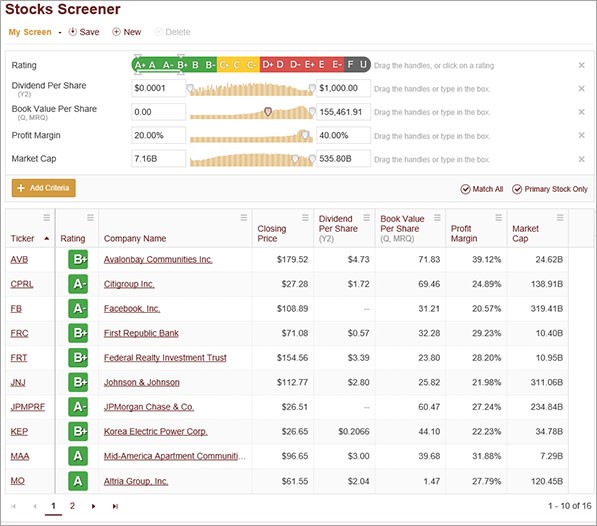
[For this tutorial we are going to use the Stocks Screener as an example, but you’ll add criteria to the other Screeners in the same way. The only difference will be the type of criteria to choose from.]
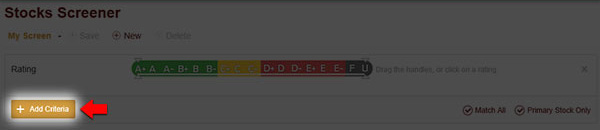
When you get to the Stocks Screener either by the navigation menu or the Stocks Screener button, your Screener will have the Rating criteria added by default. [If you don’t want Rating to be part of your Screener criteria, you can remove it by clicking the X on the right. (Red arrow)]
To narrow the Rating to a specific letter grade, simply click it, or you can define a range of Ratings by clicking and dragging the handles right or left. (Green arrows)

To add more criteria to your Screener, click the “+ Add Criteria” button on the left, below the existing criteria:
When you do that, you’ll get a pop up box with all the criteria available broken down into categories. Each category has its own list of columns to select from. Once you select a column, you can see the description for that particular criteria. (See the video below)
When you click the red Add Criteria button, what you’ve selected gets added, and you’ll see the matching results below. As you can see in our example, the five criteria we added returned a list of 16 stocks.
STEP 4: Adjusting Results
Say you’re not satisfied with the results you get after adding your criteria. Well, you can do something about it. Just like Rating, many of the criteria have sliders and value boxes you can adjust, should you want to refine that criteria further, after you’ve added it.
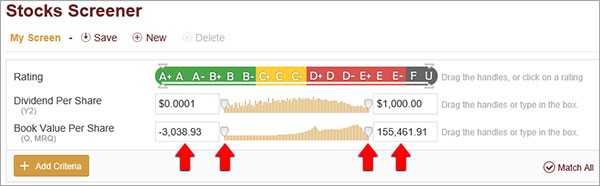
(And remember, you can also delete criteria entirely by clicking the gray X on the right side of its box.)
STEP 5: Saving Your Screener
If you’re happy with the results your Screener has generated for you, and you’d like to save it to refer back to over and over, you can do that. All you need to do to is click where it says “My Screen” at the top of the page.

The text will turn blue, and you can type whatever you want to name this Screener into the box. Clicking the Save button saves your Screener and you can access it anytime you like.
STEP 6: Finding Your Saved Screeners
To access your Screeners, click the words “Stocks Screener” in the upper left, and you’ll be taken to a page that lists all your saved Screeners. You’ll also see a list of Common Screens we’ve created that you can customize.
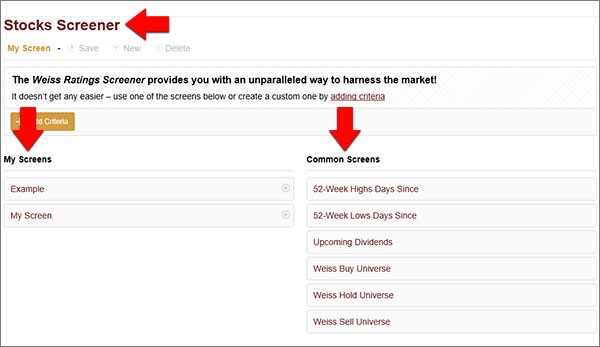
And that’s how you can use and save Screeners to deliver data the exact way you need it.
Yes: Return to the Weiss Ratings homepage
No: Back to previous page - Weiss Ratings help